So here are a few things I’ve learned lately.
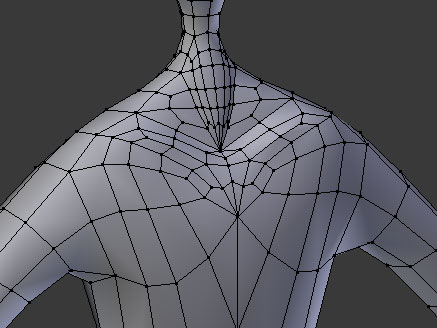
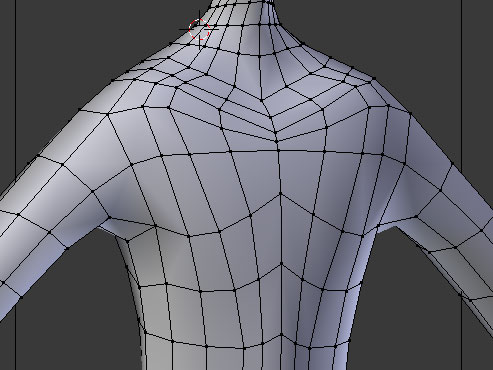
The torso above is functional, the way a hastily constructed computer program is functional. It has the right shape. There’s a neck and body and arms and some definition to the collarbones.
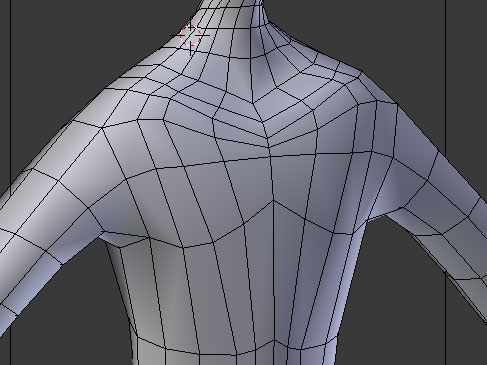
But from an organizational standpoint, it’s a complete mess. Compare that to this torso:
Here, I’ve created a pretty strict grid. The overall shape is basically the same, but it’s easier to tell what’s going on. My mesh doesn’t just need to have a certain shape: it must also communicate to me, the modeler, what that shape is. Like well-named variables and functions, this mesh is self-documenting. I can look at these long, smooth curves on the grid and get a good sense of what those curves represent in three dimensions. I can’t really do that with the first torso; the lines, such as they are, are jumbled and jagged.
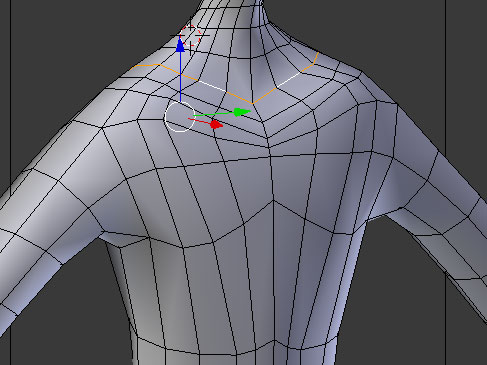
Working in this sort of way also makes editing easier. The modeling software I use has built-in tools to select whole lines or circuits on my grid, like the orange lines here:
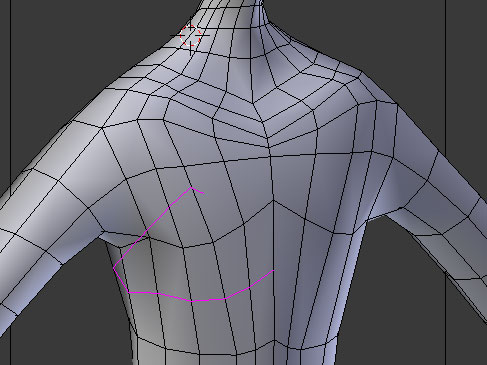
I can also add detail to my mesh fairly easy. If I decide my character’s sides aren’t smooth enough, I can quickly add a loop cut, shown in purple here:
Loop cutting breaks every square along the loop in half, so I can refine a specific area. And once cut, my mesh is still a nice, neat grid which can be further refined with more loop cuts.
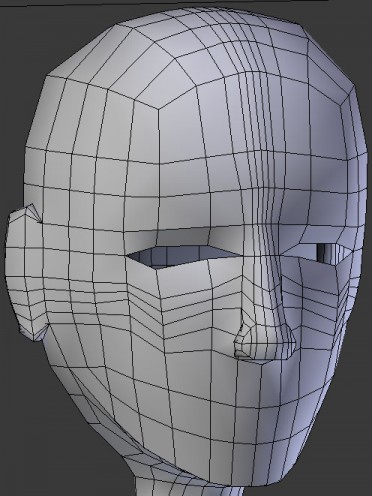
Just imposing a grid on the mesh isn’t enough, though. This face has a simple grid structure:
Trouble is, this grid isn’t structured that logically. I probably wouldn’t want to take a random cross-section of the face and move it, or scale it, or whatever.
If I want to add some detail to the eye sockets, I could add a loop cut, like I did with my torso. But this loop cut wouldn’t just affect the eyes: it would also add lots of unnecessary detail around the temples and back of the head.
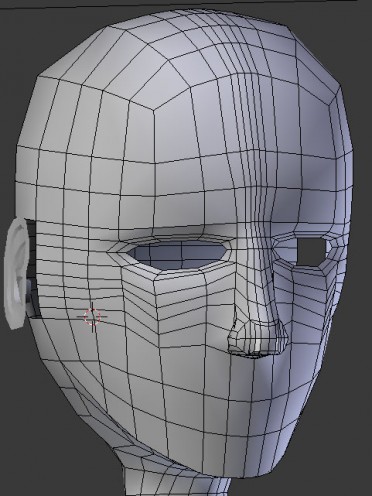
So what I need to do here is change the way the grid works, just in one localized area. Like so:
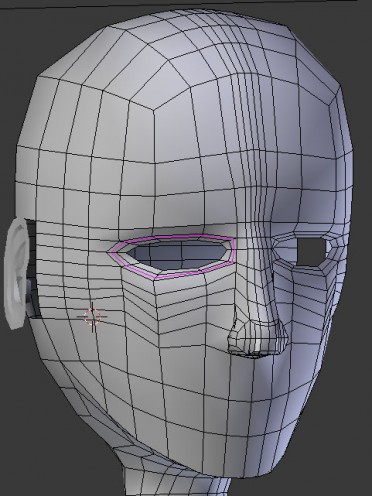
Here, the area around the eyes is its own closed polar grid, while the rest of the face retains the square grid it started with. And now, if I want to add detail to the eye sockets, I can add a circular, eye-shaped cut, like this:
That loop makes sense to me. It represents an area of the model that I think of as one unit. And again, just seeing the polar grid around the eyes helps me understand the geometry of the eyes, more than the previous approach did.
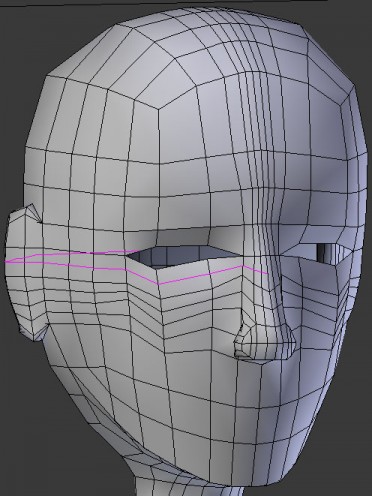
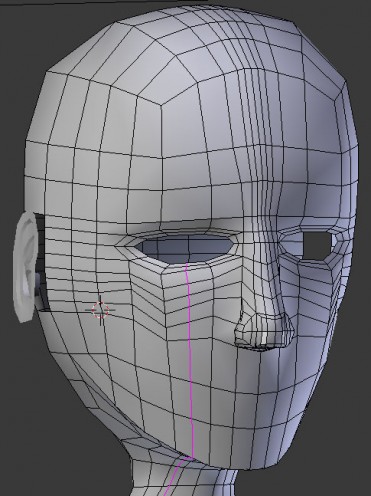
One thing I’m struggling with here is this idea of adding pockets of detail. Suppose, for instance, I wanted to smooth out the contour of the eyelid. Right now, I’d have to add a loop cut like this:
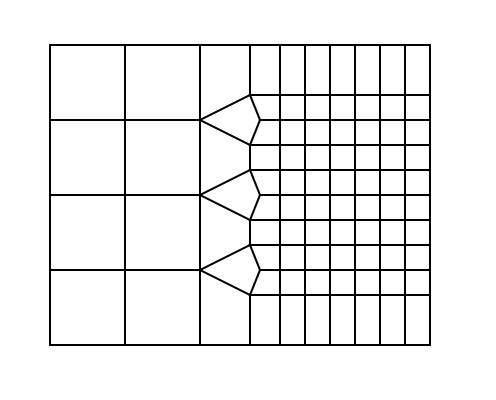
…Which will add extra smoothness around the eye, but will also add unnecessary geometry down the cheeks, and along the neck, and who knows where else. I’m trying to come up with simple, general-purpose strategies for adding detail, like this method of smoothly transitioning from a coarse grid to a finer one.
That might work in some instances, though maybe not the eye specifically. I still have much to learn here.
